Strategy English version

(Update: 2021,10,1)

caution
  This page is an English translation of a Japanese strategy site with the theme of "Everyone knows this already, so we don't talk about it now, but the truth is that newcomers may not know this, so let's get our knowledge together.
This page has been translated using Google and other translators. Please note that I am not good at English, so there may be problems with the translation.

Before starting the game
▼Check the rules etc.
▼About Gasha
▼If the same thing is covered
▼Benefits of joining an alliance

Frequently Asked Questions
▼Meaning of each status
▼Relationship between status and POW
▼Chat functions
▼GvG・Contribution Points
▼Procedure for clearing the AOM
▼SAM
▼About High Difficulty Missions
▼Enemy shinobi are not affected by ulti or state abnormalities
▼How to enter the decisive battlefield in the AM
▼Fort Defense Trivia
▼How to obtain the various medals
▼What is Tuskill?
▼Which one to buy shinobite?

▼link


【Check the rules etc.】
・If you do not know the rules, you will often be in trouble later, such as "Once you clear this mission, you cannot re-challenge (you cannot get 100% of the reward)" and "You cannot continue to use the Shinobi that you used once at this event." First of all, let's check the rules carefully and challenge the mission.
・Refer to the image for the position of "help" that is difficult to understand


【About Gasha】
・In addition to the pickup gashas that contain powerful newly implemented tags, there are also gashas that contain older versions of tags that are actually not very useful, prepared in a large scale and in a very luxurious way. If you want to aim for a strong tag, you should consult with someone who actually plays the game before pulling it. Basically, the management of Shinobol is evil and should not be trusted.
・Carefully check the "Details" and "Provision ratio" in the upper right corner of Gasha. In the image, 10 keys are the step 2 of the first lap, but since it is one lap, it may be inadvertently misunderstood that you can get it immediately in one lap. Since it is step 2, you have to draw 20 times in a row. The appearance rate of 4 stars or more is 40%, so what is the probability of hitting 5 stars? Also check carefully.


【If the same thing is covered】
・If you have a duplicate of the same tag, you can equip it and use it to increase your status, but you can also "synthesize" or "sell" it. "Only cards with jutsu or ulti can be synthesized, but cards without jutsu or ulti have a slightly higher status than cards of the same rarity.
・When you synthesize them, you can increase their jutsu level or ulti level, but you will gain more levels if you evolve them and increase their rarity before synthesizing them as is. The level of the tag is irrelevant. If you use the "Batch Evolution" function, it will set the tag to the optimal state for synthesis (Lv.1 of the maximum rarity). When you evolve, your maximum level will also increase.
(*In the case of EX Ult, evolving it does not affect its synthesis level. You can either synthesize it without doing anything, or use it as a status card even if you have a duplicate, since its status is very high.)

・If you sell it, you will get ability points. As with synthesis, you can get more after evolving and raising the rarity.


【Benefits of joining an alliance】
・If you belong to an alliance, you can get a reward in the frame of "alliance reward" at the event, or you can get a "bond medal" every day by opening the alliance screen. In addition, the alliance has an alliance chat, so you can ask questions and problems. In the general chat outside the alliance, it will be a general chat in the group automatically sorted at login (it may not be the whole anymore ...), so if you want to check if anyone has answered the question, It's often the case that you're in another chat and you don't have a log.
・If you're wondering which alliance to join, you can search on SNS instead of searching within the app. Shinobu Bol has few capture sites, and information is actively exchanged on SNS and Discord.


【Meaning of each status】

<POW>
・A rough guide to combat power. Higher is stronger, but there are some statuses such as resistance that are not reflected here, so this does not mean that it is low = weak.
<ATK and artistic power>
・In order to extend the damage, it is good to add the power of the technique (damage up) to the ATK which is the basic attack power. It is better to raise both in a well-balanced manner than to raise either. It is good to adjust while watching the situation in test play.
<Abnormal condition resistance>
・Difficulty in becoming abnormal. Since the value given to abnormal conditions due to traps is very high, even 100% resistance cannot be prevented. It is better to think that it is for abnormal conditions caused by enemy attacks. To feel the practicality, I want to make it 80% or more as a guide.
・Continuous damage resistance is divided into small to large effects of ordinary ninjutsu and extra large effects of mystery. Poisons and effects Small to large continuous damage takes 5% of maximum HP damage every 2 seconds. How many times does the difference between small and large continue until it is damaged? Oversized continuous damage takes 10% damage instead of 5%.
<Surgical resistance>
・Cut the damage. When set to 100%, the damage received can be reduced to 1 (minimum value).


【Relationship between status and POW】
・There is a difference in the value reflected in the POW depending on the status.
For example, HP goes up by 1, POW goes up by 1, but ATK and DEF go up by 1, POW goes up by 2.5; EVA and CRI go up by 1, POW goes up by 1 for every 1.00%; resistance, for example, is not reflected in POW no matter how much you raise it.
・Jutsu converts to 2500 at level 1, and 500 POW for every level up. ulti level is 6000 at 1st level, and converts to 1000 POW for each level up.


【Chat functions】
・By pressing the name of the speaker, you can check their profile, report them, or mute them.
・In the list of mutes, you can see the names of who you have muted. At this time, the most recent name will be displayed, so you can use it to track the name you are currently using...


【GvG・Contribution Points】
・During the period of defending the Fortress in GvG, after completing the target mission, Pakkun will advance and you will get the "Book of Strategy". But if you don't use it to strengthen the fortress, you'll just have it. You can only hold up to 20,000 pts of the Book of Strategy at a time, so use it to strengthen your fortress before it runs out.
・There is a low chance of getting a flute or terrain from the box. flutes are used during attacks, but you can only have 5 of them. Terrain is grouped together in alliances, and the alliance leader decides which terrain to use from among them.


・In the raiding period, each person can raid five times during the period, and each raid will earn 1000 pts of contribution points.
・If you use a red whistle, your character will be strengthened when you enter the battle, and you will also receive more points to enter the alliance (up to five whistles can be stacked). The effects of the flute are shared within the alliance, so it's best to time it as well as possible with everyone in the alliance and go at once!
・The points that go into the alliance are 1000 pts for winning a raid and 10 pts for every 1% of enemy fort destroyed, for a total of 2000 pts.


【Procedure for clearing the AOM】
・Once a shinobi is used, it cannot be used again until the next stage is cleared. Therefore, save the shinobi to use in the next stage and fight.
・Since special effects are often followed by the same type of shinobi, such as stage 1 and 2, 3 and 4, etc., we will try to leave a strong shinobi with special effects for the next stage.
・There are four of us in the fort, so we can get by pretty well as a team, but the giant boss has to be defeated by one person, so it can be tough unless you have a character with strong inner strength. Therefore, we'll clear the giant boss first.

↓Order of clearance《 》and procedures
stage
Fort (4 characters)
Giant boss (1 character)
《2》Cleared the stage with a Shinobi that I planned not to use in Stage 2.《1》Decide on the five people you plan to use in Stage 2.Cleared the stage with a Shinobi that I planned not to use in Stage 2.
《4》Cleared the stage with a Shinobi that I planned not to use in Stage 3.《3》Decide on the five people you plan to use in Stage 3.Cleared the stage with a Shinobi that I planned not to use in Stage 3.
《6》Cleared the stage with a Shinobi that I planned not to use in Stage 4.《5》The Shinobi used in Stage 1 is back.Decide on the five people you plan to use in Stage 4.Cleared the stage with a Shinobi that I planned not to use in Stage 4.
《8》Cleared the stage with a Shinobi that I planned not to use in Stage 5.《7》The Shinobi used in Stage 2 is back.Decide on the five people you plan to use in Stage 5.Cleared the stage with a Shinobi that I planned not to use in Stage 5.
《10》Cleared the stage with a Shinobi that I planned not to use in Stage 6.《9》The Shinobi used in Stage 3 is back.Decide on the five people you plan to use in Stage 6.Cleared the stage with a Shinobi that I planned not to use in Stage 6.
《12》Seriously clear.《11》The Shinobi used in Stage 4 is back.Seriously clear.

・As long as the stage is low in difficulty, clear it without worrying about the achievement level. If you are able to clear up to stage 6, all Shinobi will be unlocked and available for unlimited use in any stage once you clear it, then aim for a high score with a strong character. If you can't clear to the end, be careful how far you aim to score, because the Shinobi you used will be restricted until you clear the next stage (both the fort and the boss).
・「installation」→It's been visible from the beginning.
 「Trap」→It's not visible at first. It comes out when you activate it.
 「Ninja sword」→Enemy shinobi will be present. This does not include miscellaneous Shinobi or animal mouth-breathers.
・Clear items for score can be seen from the "i" in the upper right corner.


【SAM】
<Tips for earning points>
・Use special characters as much as possible, since special characters are designed to give you considerably more points for the damage they do.
・It is a good idea to replace your tags and equipment with ones that have higher ATK. This is a bit tedious, but even a small difference can make a big difference in damage (i.e. clearing speed). It's better to have a good balance between ATK and the power of the jutsu or ulti you're using than to have one over the other. It's best to adjust as you go.
・If you have a jutsu that doesn't do damage, remove it and put on a tag with a higher ATK status. If you have a jutsu that increases attack power or decreases nature resistance, use it to increase ulti's damage. ulti ignores defense, so use defense down if you want to cut it with justu.
・Aim at the purple target (weak point). ulti will preferentially damage the weak point if it is in range, even if other parts of the body are in range. If you hit ulti when the part is moving, such as while spinning or moving, it will hit all parts and cause heavy damage. (The motion differs depending on the boss, so determine the best timing.
<special character>
・Even with special effects characters, there are differences in the point multiplier. (Even if special effect character A and B shoot ulti in the same way and do the same amount of damage, the points they receive are very different.) Basically, the multiplier of the character from the most recent gusher is higher, but if you have more than one special effect character, you should try a few before you start going around and compare them.
<Alliance Ranking Points>
・You get points for the number of giant bosses you defeat.(If two people work together to defeat one boss, they will receive points for one boss, not for each of them.)
・If two people work together to defeat one boss, they will receive points for one boss, not for each of them.
・Note that if you switch to public from the middle of the game (if it is public when you destroy it), the alliance will not receive any points.
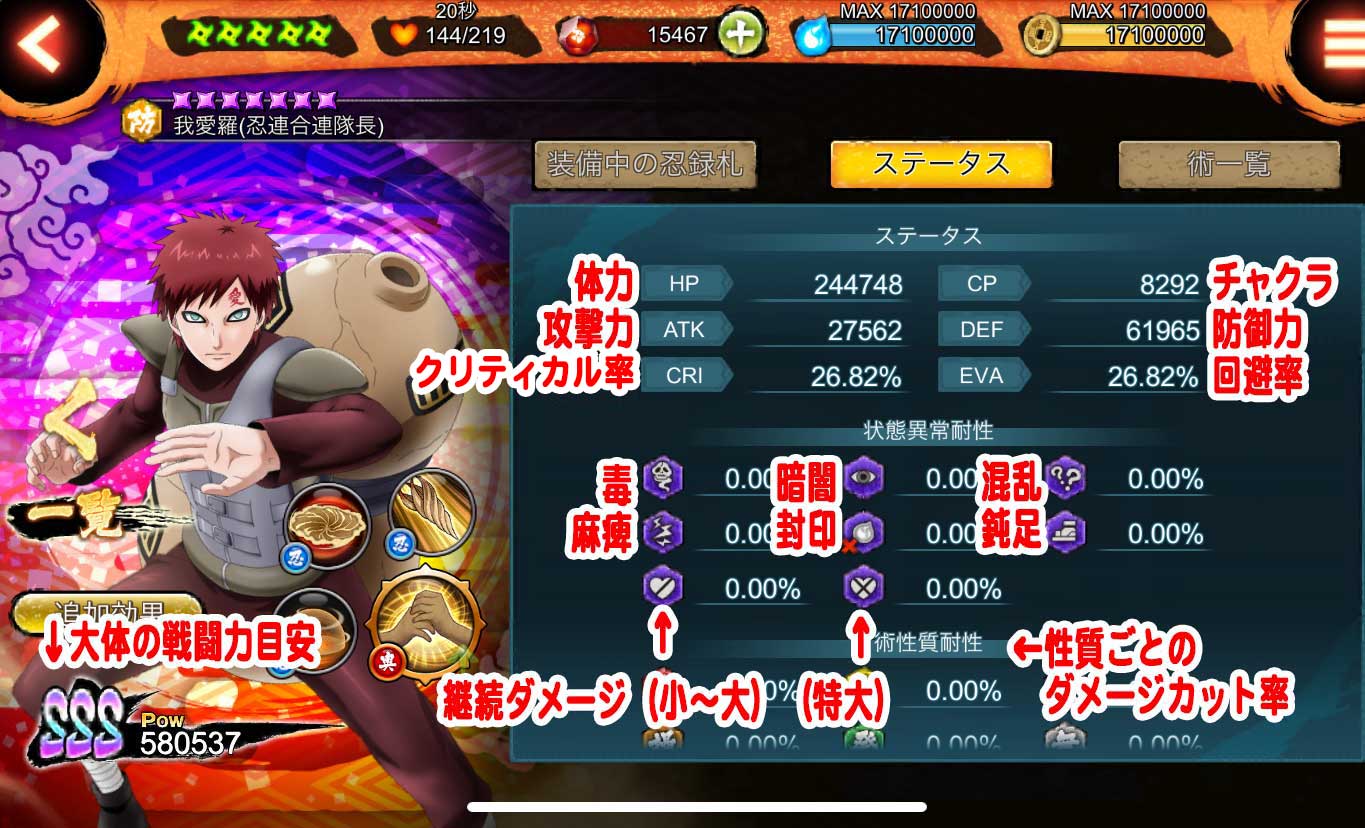
<What's this about 10 daily kills?>
・SAM points. The points are added when you get them. The image looks like a medal, but it's not a medal.


【About High Difficulty Missions】
・As stated in the rules for high difficulty missions, if there is even one non-specialty shinobi in the mix, the drop rate for rewards will drop to almost nothing. Be sure to clear the mission with four shinobi with special effects.
・It is predetermined which enemies will drop which rewards. If you are running out of time, if you know which enemy drops the reward you want (especially the key), you can destroy that enemy and go straight to the battlefield.
・In many cases, enemies are highly resistant to jutsu and will do more damage if you hit them with normal attacks. If you don't want your character to use jutsu, you can remove it from your gear.


【Enemy shinobi are not affected by ulti or state abnormalities.】
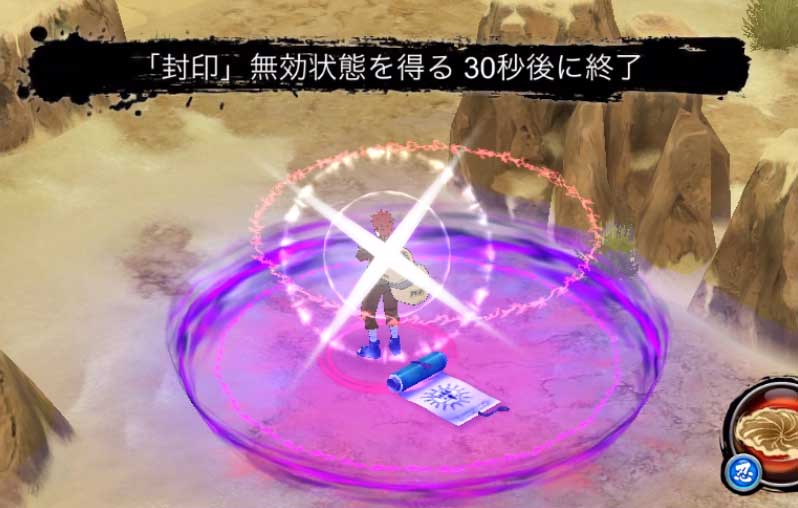
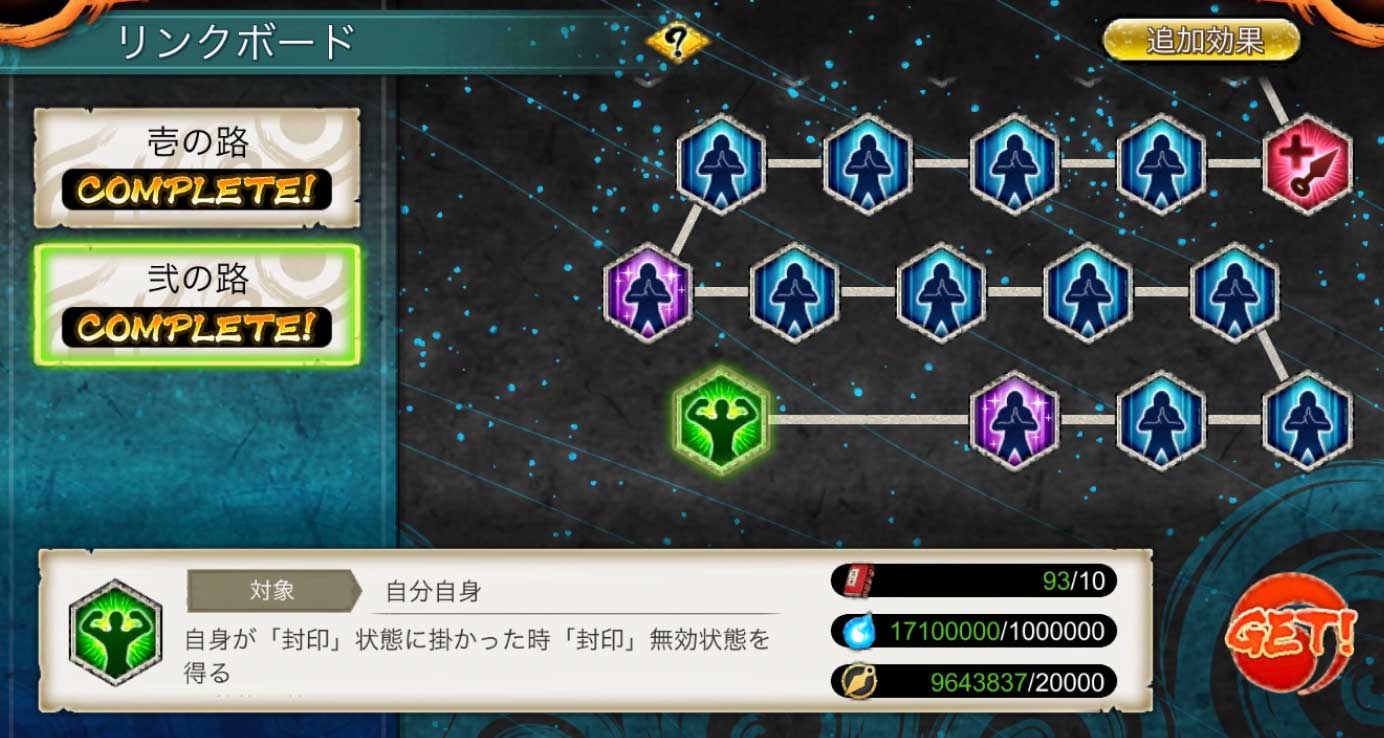
<Disables abnormal conditions.>
・Enemy shinobi are not affected by ulti or state abnormalities. 。
<invincible>
・The glittering surroundings glow.
・It makes you invincible and also removes abnormalities and other conditions.
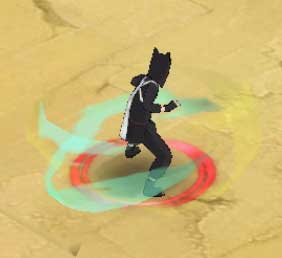
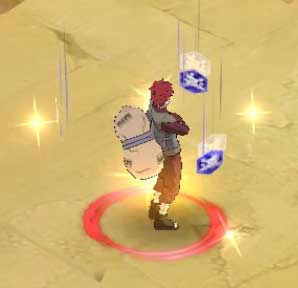
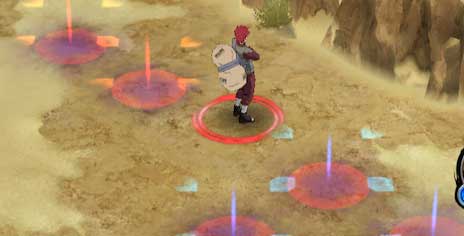
<resistance>
・There is a resistance to the power and abnormalities of the nature of jutsu.
・When jutsu's nature resistance is increased, the mark of the nature will appear around it. The photo shows invincibility and annihilation resistance at the same time.
・If it is falling off like flakes, the nature resistance down.
・The effect of increased resistance is only shown if it goes up or down during the mission, not if it comes from equipment or other sources.

<Link Board Effectiveness>
・Depending on the character, the last square on the link board has a state invulnerability (activates once per mission, for 30 seconds).
・It glitters when it is activated. The same effect can be seen in "When ~ seconds have passed since the start of the battle, ~ is increased.


【How to enter the decisive battlefield in the AM】
<Lure in obstacles and sub-characters.>
・You can lure enemies by placing obstacles that can be targeted, or by pushing your sub characters into them. You can also make Lin's 10-second invincibility come into play.
<force (bulldoze) one's way through>
・Even if the wards have not been completely lifted, you can force your way in as long as you have defeated at least one shinobi other than the Resurrection Squad. You will take damage based on the ratio of remaining wards, and since your HP will be reduced, you can use this damage to force your sub characters to use ulti.
・Some Japanese players do not like it when this is done to them when they have plenty of time to spare, saying, "I worked hard to build this fort, but it was raided lazily and in a short time," or "I want you to play with me properly in full battle.
<instantaneous attack>
・Immediately after entering the battlefield, you will not be able to take any action other than moving for a few seconds. If you are caught by the enemy during this time, you will be beaten to a pulp, so the countermeasure to get out of jutsu before those few seconds are up is called immediate shooting.
・The buttons for jutsu and ulti are not activated immediately upon pressing them, but the moment you release your finger from the button (not if you hold it down for a long time). So, by pressing the button before entering the battlefield and releasing it in the split second between crossing the boundary of the battlefield and it locking (practice required), you can attack first the moment you enter the battlefield.
・If you are using a wooden bridge, the second line from the battlefield will be the boundary between the bridge and the battlefield, and if you push on the third line, your fingers will leave the bridge when your foot is just above the second line. Once you get used to it, you will be able to feel the stone bridge without lines.


【Fort Defense Trivia】
<Timing of Defense>
・The AM is performed every two hours. When you AM, this time count is reset.
<How to increase the number of traps>
・When you purchase new terrain for your fort, all traps on that terrain will be available as stock.
・After a while, traps that were available at events, etc., will line up in the fort medal store and can be purchased with fort medals.
<hidden installation>
・The exterior of the fort can be changed to have different heights of walls, trees, and rocks. Illusion devices, incense, and other items can be hidden and placed behind obstacles.
・The Shinobi camp also has an incense completely hidden behind the character icon.
<Lynn on the battlefield>
・Lynn has a ulti that makes all of her friends invincible for 10 seconds, which is very powerful for buying time on the battlefield. This can be used at level 8 with a cool time of 32 seconds, and the cool time can be reduced by another 10.4 seconds by releasing abilities.
・If you want to make sure that ulti is used on the first move to counter an immediate attack, pull out a move other than ulti.
・Obstacles that can be put up by installation jutsu or by putting friends into the battlefield can be triggered before the player enters.
<jutsu used by defense ninjas>
・The order in which the three jutsus are used is as follows: the bottom one set on the button is used first. (Except for recovery techniques and others with special timing.
・ulti is used at less than 50% HP; EX Ult is also used at about 70% HP.
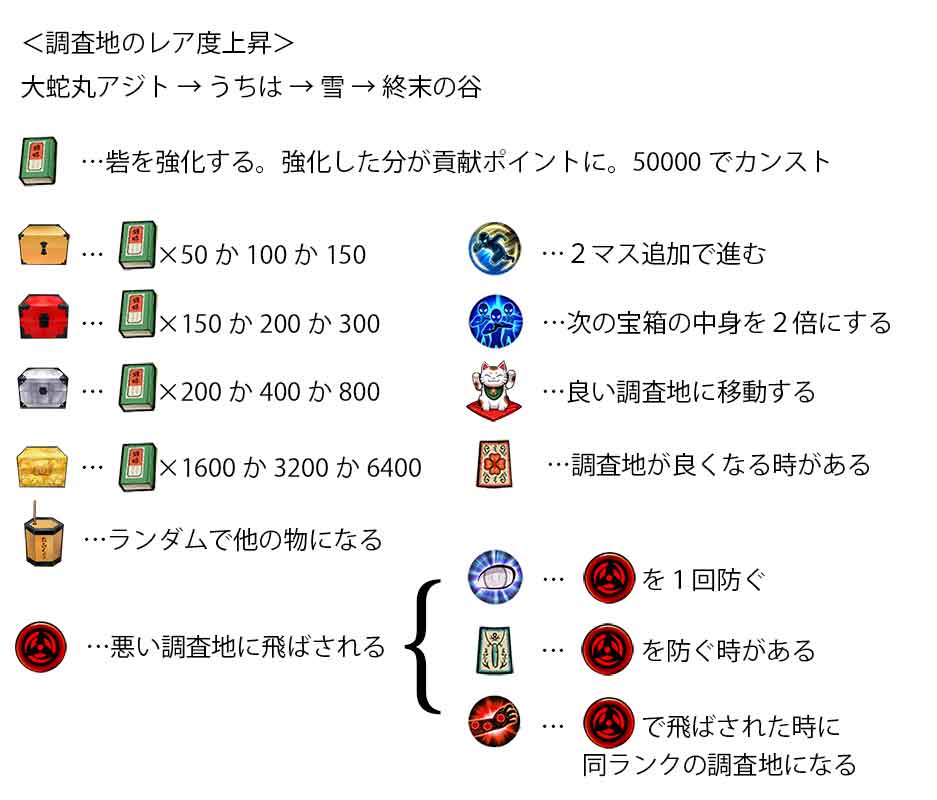
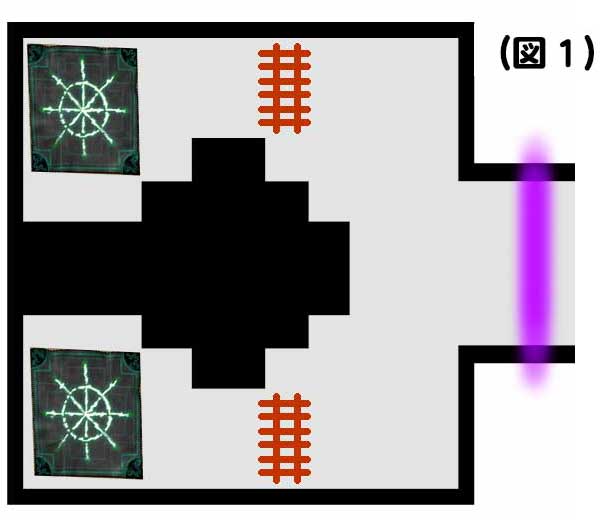
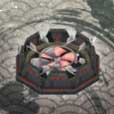
<Tornado Trap>
・Cost 1 flies to the floor, and cost 3 flies to the adjacent floor. However, even at cost 3, if there is an enemy on the floor (with the purple ward set up), you cannot leave the floor, so the effect is the same as cost 1.
・It will not fly to the floor where the large animal is, even if it is on an adjacent floor. Even if the large animal is absent during the cool time, it will be treated as present unless you visit the floor once to confirm its absence.
・Even if you don't have the trap disarming jutsu, you can disarm a trap by advancing on it with a normal attack and returning immediately.
・You can't fall into squares where traps are placed.

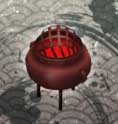
<incense>
・In the description, it just says that it increases attack and defense power, but specifically, it does about 30% more or 30% less damage.
・Once in range of the incense, all the incense on the floor will be activated at once. After that, even if the Shinobi is out of range, the incense will continue to work until all the incense on the floor is destroyed, so it is sometimes placed at a distance as insurance.
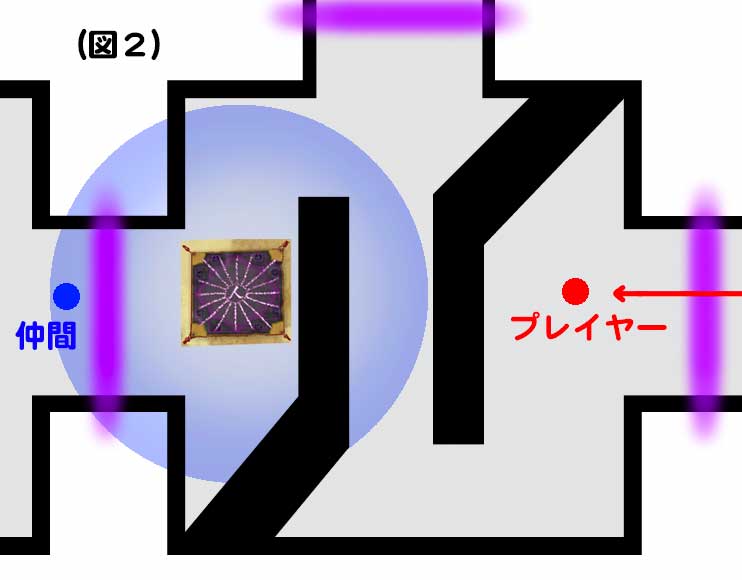
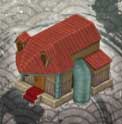
<art of drawing and painting with toadstools>
・It forces the trapped person to rest until he or she recovers fully. If they are taken out by the trap release, they will still be out for a while, so you can buy time by blocking their path.
・It has a range of 9 squares, but if you walk along the wall instead of through the center, you can just barely get through without triggering it.
・While you are inside the house, you will not take damage, but you will be subject to chakra absorption, etc.

<Sensing color of the trap>
・Traps that appear in orange when sensed are traps that are activated when stepped on. Light blue is a trap that is triggered when the trap is released, but breaks when stepped on. The traps that break when stepped on normally can be placed with fences, incense, etc., and the marauder's sub-character will use the technique to trigger it on its own.

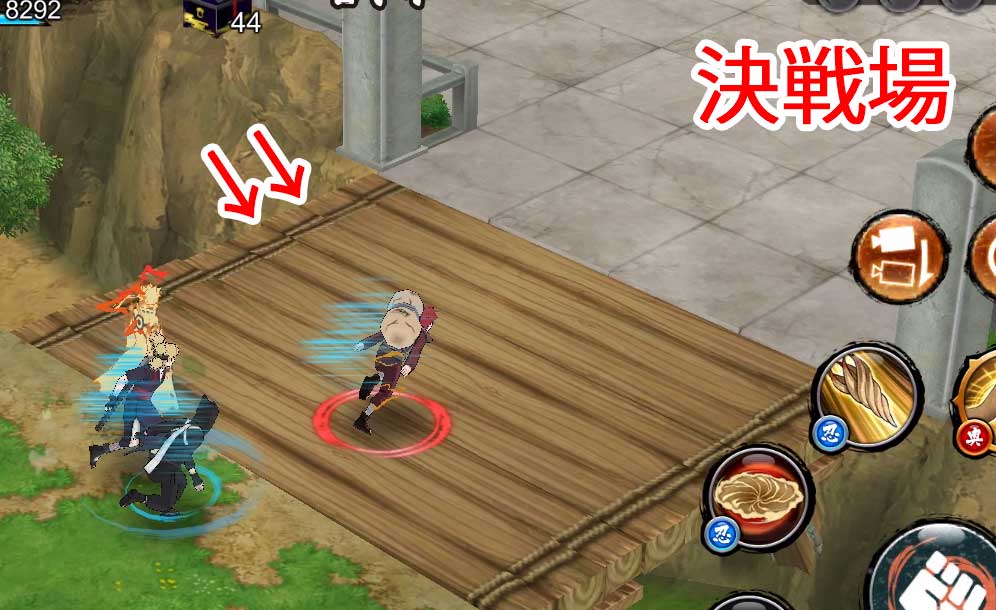
<forced entry>
・Placement that forces you to enter the battlefield. Use toad bombs to draw them in, then use the water to push them out. If you put on a device that disables magic, it can only be destroyed with a normal attack, so you'll be trapped if you don't avoid the water and toad's tongue well enough to destroy it.

<Shinobi camp layout>
・Sub-characters will return to the player in a straight line if there are no enemies or facilities. (Fig. 1) If you fence off the area where you are sent by the tornado, you will not go all the way to the back of the room, so the purple ward cannot be released and you will be trapped on that floor.
・Sometimes the moment you enter a floor, even though you are not approaching a shinobi camp, the camp will suddenly activate and the shinobi will appear. This is due to the fact that if a companion is trapped on the floor next to it, the companion on the next floor will enter the appearance range of the shinobi's formation, and the formation will react even though the floor is different. (Figure 2)
  

<Floor number of the fort>
・Whenever a fort meeting is held to discuss traps for the fort with the alliance, it is called by the same numbering scheme as the telephone in order to communicate the location clearly. It's useful to remember.


【How to obtain the various medals】
<AM Medal>
・League Rewards in AM.
・Every week you will be rewarded & reclassified back to the next league down; leagues with a PT of 2100 or higher will start at a flat rate of 2000.
<Fortress Medal>
・Attack missions, fort defense, and event rewards.
<Kizuna Medal>
・Alliance logins, alliance event rewards, etc.
<Factory Medal>
・Ninjutsu material search missions and other daily missions.
<Gasha Medal>
・Extra for each gusher.


【What is Tuskill?】
・Tuskill is short for task kill, which is to drop an application. What we usually do when we exit a game.
・Mainly when selecting forts in AM, if you update and only hit forts you don't want to go to, such as terrain you don't like or shinobi placement, you can use taskmaster to pretend it never happened before you leave.
・If you tusk while selecting a fort, the BP (green shuriken) to go to the AM is already consumed when you enter the fort selection, but there is no increase or decrease in points based on victory or defeat.
・If you taskmaster while AMing, the AM will be treated as a loss due to a communication error. This is the reason why the defense log ends with the player leaving when he is about to lose. It seems that the number of losses in the profile screen doesn't increase when you tusk, but it doesn't matter because your points will be reduced as if you lost.


【Which one to buy shinobite?】
・The price per unit varies depending on the number of units you buy in bulk, so I've compiled a list of which ones are the best deals. As you can see in the image below, if you plan to log in every day without fail, the Gamamichi pack is quite cheap.
・The green balls used to give HP can be bought from the Special Shop for 50 shinobites, so there's no need to go out and buy them.
・The rarer tags that come with the extra cards have a higher status than the normal EX ulti cards and so on.
・If you buy a new phone or otherwise transfer to a different OS, be careful not to leave your purchased shinobite or Gamamichi pack behind, as they will not be transferred.
*The image is in Japanese yen, but you should calculate the price per shinobite when you shop.


【link】
→Original page in Japanese


砂隠れ 五代目風影 我愛羅(@gaara389)